STM32Cube IDE and PuTTY Installation Instructions
微处理器系统作业代写 The STM32CubeIDE IDE is one of many IDEs (Integrated Development Environments) available for programming STM32 microcontrollers.
Microprocessor Systems ECSE-4790
Introduction
The STM32CubeIDE IDE is one of many IDEs (Integrated Development Environments) available for programming STM32 microcontrollers. Other include AC6 System Workbench, IAR Systems, ARM KEIL, etc. We will use STM32CubeIDE as it is (1) free and (2) provided from STMicroelectronics directly.微处理器系统作业代写
You will also need a Serial Terminal program installed. I suggest PuTTY on Windows and minicom/picocom on Linux. MacOS: Find one you like.
Contents 微处理器系统作业代写
1Installation ………………………………………………………………………………………..2
ontents
1.1Installing STM32CubeIDEfor Windows ………………………………………………..2
1.2Installing STM32CubeIDEfor Linux ……………………………………………………2
1.3Terminal Emulator Program(Windows instructions) ……………………………..2
2Starting up STM32CubeIDE for the firsttime………………………………………………3
3Importing and Running aProject ……………………………………………………………..4
3.1Connecting PuTTY……………………………………………………………………. …………7
1 Installation
1.1 Installing STM32CubeIDE for Windows:
- Download the installer for Windows from here:https://st.com/…/stm32cubeide.html.
- Note that in order to download the software, you will have to register withcom.
- Unzip the installer from the zippackage
- Run it and click through to install. Leave all defaultsas-is.
1.2 Installing STM32CubeIDE for Linux:
To install the SiLabs IDE, follow the simple instructions below:
- Download the installer for you distribution from here, I installed the “Lnx” version (though I assume the DEB or RPM versions work as well):https://st.com/…/stm32cubeide.html.
- For the “Lnx” version, do the following:
- Open a terminal and navigate to where the package was downloaded.
- Run thecommands:
$ unzip en.st-stm32cubeide_*_amd64.sh.zip 微处理器系统作业代写
$ chmod +x st-stm32cubeide_*_amd64.sh
$ ./st-stm32cubeide_*_amd64.sh
- The last command launches the installer.
- Accept the license: [Y] (press spacebar to read through, Q to skip toend)
- Allow segger-jlink-udev-rules to be added: [Y]
- Set your desired install directory (you must have write access toit).
- “Do you want to continue?” [Y] (prompt to continue to installudev-rules)
- Accept more..
- Installer should finish after that. If you’re luckly, the installer should have given you a stm32cubeide.desktop file in your ~/.local/share/applications/ folder which should give you the program in your applications menu.

- Open the executable that was just downloaded and allow the installation wizard to step you through the installation process. Once again, it is recommended that you leave everything at the default settings. If this is a second install – check the “Maintain or update the instance of this application…”
- To ensure the IDE was properly installed, click on the Start Menu, click on the C: drive on This PC, and see that SiLabs (Silicon Laboratories) shows up on the list. If it does, you have successfully installed the SiLabs 微处理器系统作业代写
1.3 Terminal Emulator Program (Windows instructions)
PuTTY is a free and open source ssh and telnet application for both Windows and Unix-like environ- ments and is the recommended terminal emulator program for use in this course. Previously, it has been SecureCRT. You may use either (or another if you are familiar with one). The instructions be- low are for PuTTY.
- Download the fileputty-64bit-0.74-installer.msi.
- Run the installer using the default
- Verify that PuTTY installed correctly by finding PuTTY in the Start Menu. Note that multiple programs are installed via this package. This course uses PuTTY, not PuTTYgen, PSFTP,etc. 微处理器系统作业代写
2 Starting up STM32CubeIDE for the first time
- Start the STM32CubeIDE program. It will ask you to select aworkspace:
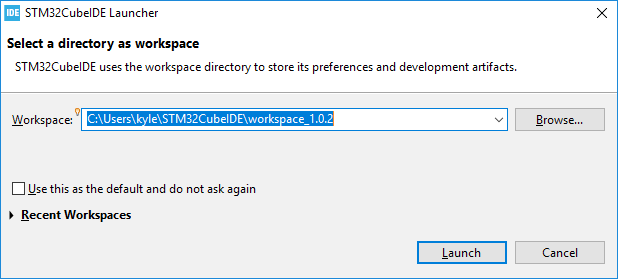
- Select a workspace folder that is convenient for you to access that does not have any spaces or special characters in the path.
- Before proceeding with STM32CubeIDE, download thezip library from the MPS website. Extract the contents to the workspace that you just selected. The workspace structure should now be:
workspace/
stm32lib/
CMSIS/
STM32F7xx_HAL_Driver/ 微处理器系统作业代写
- Ensure that there is not two stm32lib folders! If there is, move the inner to the workspace.
- Now, click “Launch”
- The full STM32CubeIDE program should load.
3 Importing and Running a Project 微处理器系统作业代写
- We’ll import the Lab 1 template project to get started. Download the Lab 1 templateproject: Lab01_ANSI_Term-GPIO_Template.zip, from the MPSwebsite.
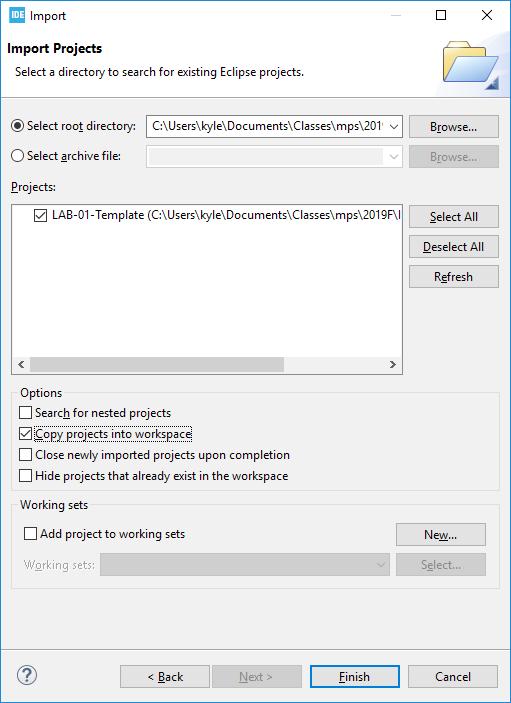
- In STM32CubeIDE, click “File→Import…” This will bring up the import dialog (nextpage)
- In this dialog, select “General/Existing Projects intoWorkspace”
- Select the “Select archive file” option, then locate the zipped lab folder using theactive “Browse…” button on the right.
- Click “Finish” to import the project.
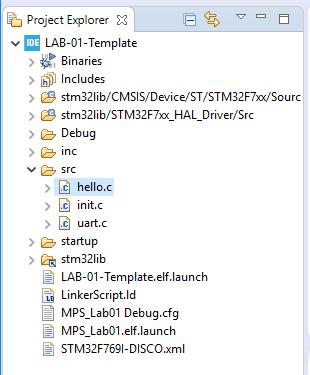
The IDE should update with the project now listed on the left of the screen.
-
Open up the “src” folder and double click on “hello.c”. This is the main code for the project.
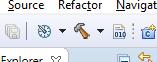
- You should now be able to compile/build the code. Do this by clicking the hammer icon.
- If all went well, you should see something like this output in the “Console”window:
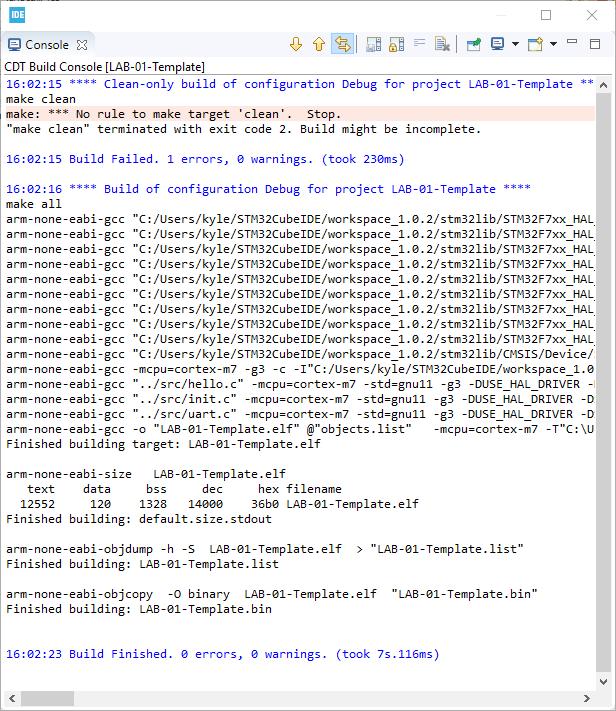
- Note that the build has “0 errors, 0 warnings”. You can ignore anything before “Build of configuration Debug for project LAB-01-Template”
- Plug in your STM32 board using a regular microusb cable into the “ST_LINK” port ofthe board.
- Click the “Bug” Icon on the top toolbar. This starts the “Debugging” tool, whichwill download the code and allow you to run/debug it on the microcontroller.

-
Since this is the first time you pressed this, this dialog will showup:
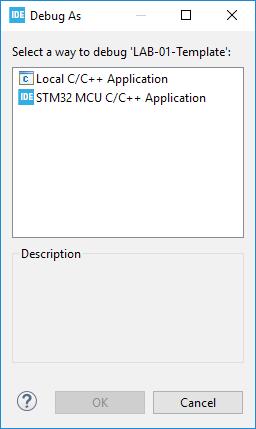
- Select “STM32 MCU C/C++ Application” and clickOK
- This should bring you to the “Edit Configuration” dialog. You should not need todo anything here, assuming the build was successful. Click OK.微处理器系统作业代写
- The device should be programmed at this point and the IDE will ask you this confirm a “Perspective Switch”. I suggest selecting “Remember my decision” and clicking”Switch”.
- You should now see something like this:
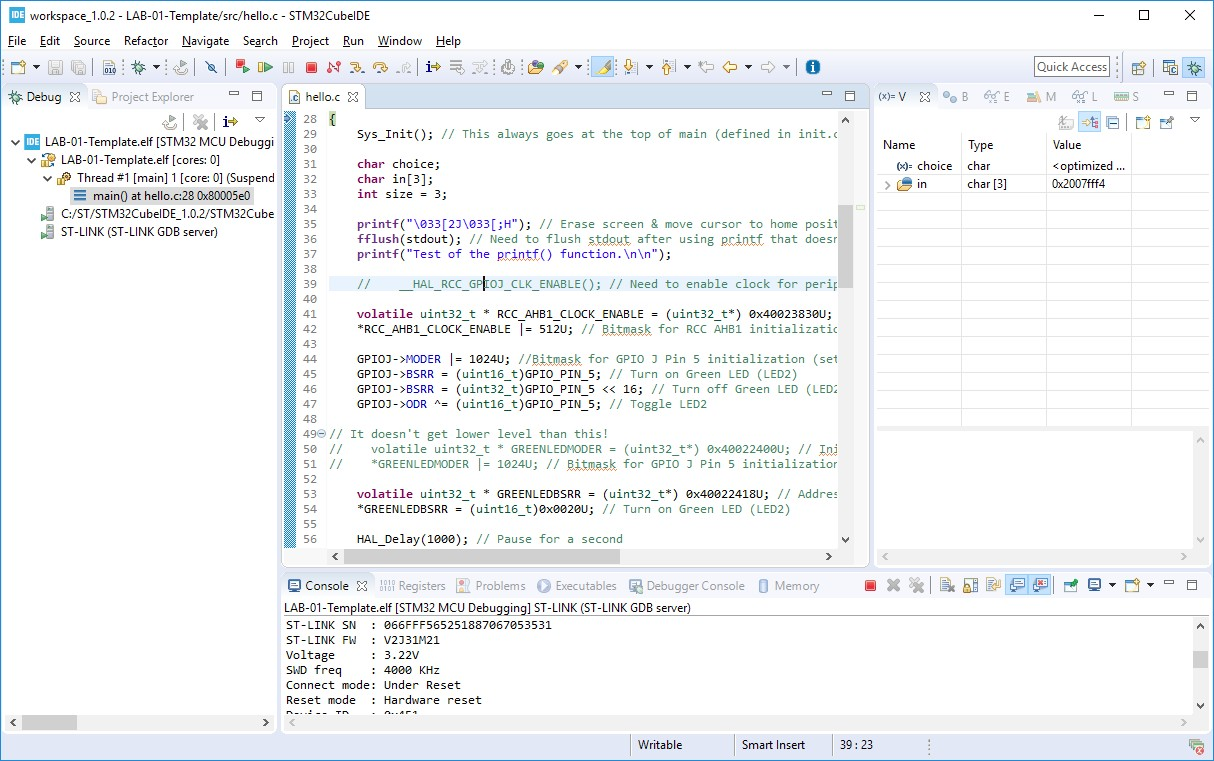
- Before you run the code, you should connect PuTTY or another serial terminal.Instructions for PuTTY are below. The speed for the communication should be 115200.
- Now, click the “Play” button to run your code. You should see output in the PuTTY window.

3.1 Connecting PuTTY
- Run PuTTY (orexe)
- In the window that appears, do the following:
a.Select the Serial radio button near the upper right (not the “Serial” on the bottomleft)
b.Change Speed to
c.Change Serial line to the necessary COMport:
i.Look for ‘ST-Link’ devices in Windows device manager for the correct COM port number. This device will be found under the ‘Ports’ category.
d.Click on Terminal->Keyboard (on left). Select the VT100+ radio button.
e.Click on Terminal (on left). Select “Enable BlinkingText”
3.Click This will launch a terminal session if configuredproperly.微处理器系统作业代写
Saving Settings:
You can configure and save a session so you do not need to do the configuration above each time. However, it is possible that the COM port will not be the same across different sessions (usually changes because of different physical USB port plugged into). To save your settings:
- After completing step 2above:
- Type a name into the Saved Sessions box (e.g.,MPS-COM3).
- Click Save on the
- A new item will appear with the name provided in the Saved Sessions box
Loading Settings:
There are two options here:
- Double-click on the saved settings that you want to load. This will automatically startthe terminal session using these settings.
- Single-clock on the saved settings that you want to load.
a.ClickLoad 微处理器系统作业代写
b.Change any settings (such as COM port as desired)
c.Click Open. This will start the terminalsession
NOTE: If your program is unresponsive, the easiest thing to check first is PuTTY by simply closing, reconnecting and restarting your code. If this doesn’t fix it, the problem likely is stemming from the downloaded code of another issue.

其他代写:program代写 cs作业代写 app代写 Programming代写 homework代写 source code代写 考试助攻 finance代写 代写CS C++代写 finance代写 java代写 金融经济统计代写 assembly代写